Sunday, March 6, 2011

101 Bean Soup - It's Just Plain Hard to Cook With Beans

I'm sure it was almost a month ago, as I was perusing the bulk section that I decided to buy a bag of 15 Bean Soup Mix.  I finally used them for today's Sunday Stew Special.  Here's what I did.


Ingredients:
4 slices bacon, diced
2 carrots, diced
3 carrots, diced
3 tablespoons chili powder
1 clove garlic, minced
8 ounce package 15 bean
 mixture, soaked overnight, drained & rinsed
1 (28 ounce) can crushed
tomatoes
2 cups vegetable stock
salt and pepper to taste
Directions:

1. Heat a large skillet over medium heat. Cook the bacon for a few minutes, then add carrots. Cook, stirring frequently for about 5 minutes. Stir in chili powder and garlic; cook for 2 more minutes. Transfer the mixture to the slow cooker, and add beans & tomatoes in juice.  Pour Veggie stock over all and stir.  (I learned how to make Veggie Stock from my friend, Lisa.
2. Cover, and cook 6 hours on low or until beans are tender. (6 hours wasn't long enough for my beans!) Season with salt and fresh ground pepper to taste.

We came home from church to the smell of a delicious bean soup waiting for us.  But when I took the lid off and sampled it, I discovered they were still hard.  Arrrgh!  I hurriedly put the beans in a pot to simmer on the stove, but it was almost an hour till they were tender enough to serve.  I'm sure by that point my family would have eaten rocks so they were just happy when they were called to the table.


It was served piping hot with whole wheat buns.  Here were the reviews from the Brownlee Test Kitchen!

Husband:  I like it.  It's good.  Really.  But yeah.... the beans are a little underdone.
Homestay Student:  I didn't even know they weren't done enough.  It's so good.  I love the spice.  I'm glad it has no meat; I was craving something not very heavy.
Grandma:  It's good.  The flavour is very nice.
10 Yr Old:  It's a little spicy.
12 Yr Old:  I haven't tried it yet, it's too hot.  The bun is good dipped in it.  (I never did get her opinion on the soup.  Actually, I'm not even sure if she actually ate any.)
4 Yr Old:  She didn't even make it till lunch was ready; she ate a bun and then had a nap.
The Cook:  I really like the mild spicy flavour, but how long do I need to cook these beans???  Maybe I should have done them in the slow cooker all night long.

To get to the bottom of my underdone lentils, I found a helpful article with great tips for cooking with dried beans.   I figured out what I did wrong -  cooking them in the acidic tomato juice actually means they will take longer.  The tomatoes should get added at the very end.  I'm not going to give up learning how to cook with dried beans yet!  I will conquer those stubborn little legumes!

P.S.  The reason I called this 101 Bean Soup is because when my youngest asked me what I was making, and I answered, "15 Bean Soup", she said, "You mean 101 Bean Soup.  Because there's 101 Puppies in the doggie movie."  Gotta love 4 yr old logic.

Saturday, March 5, 2011

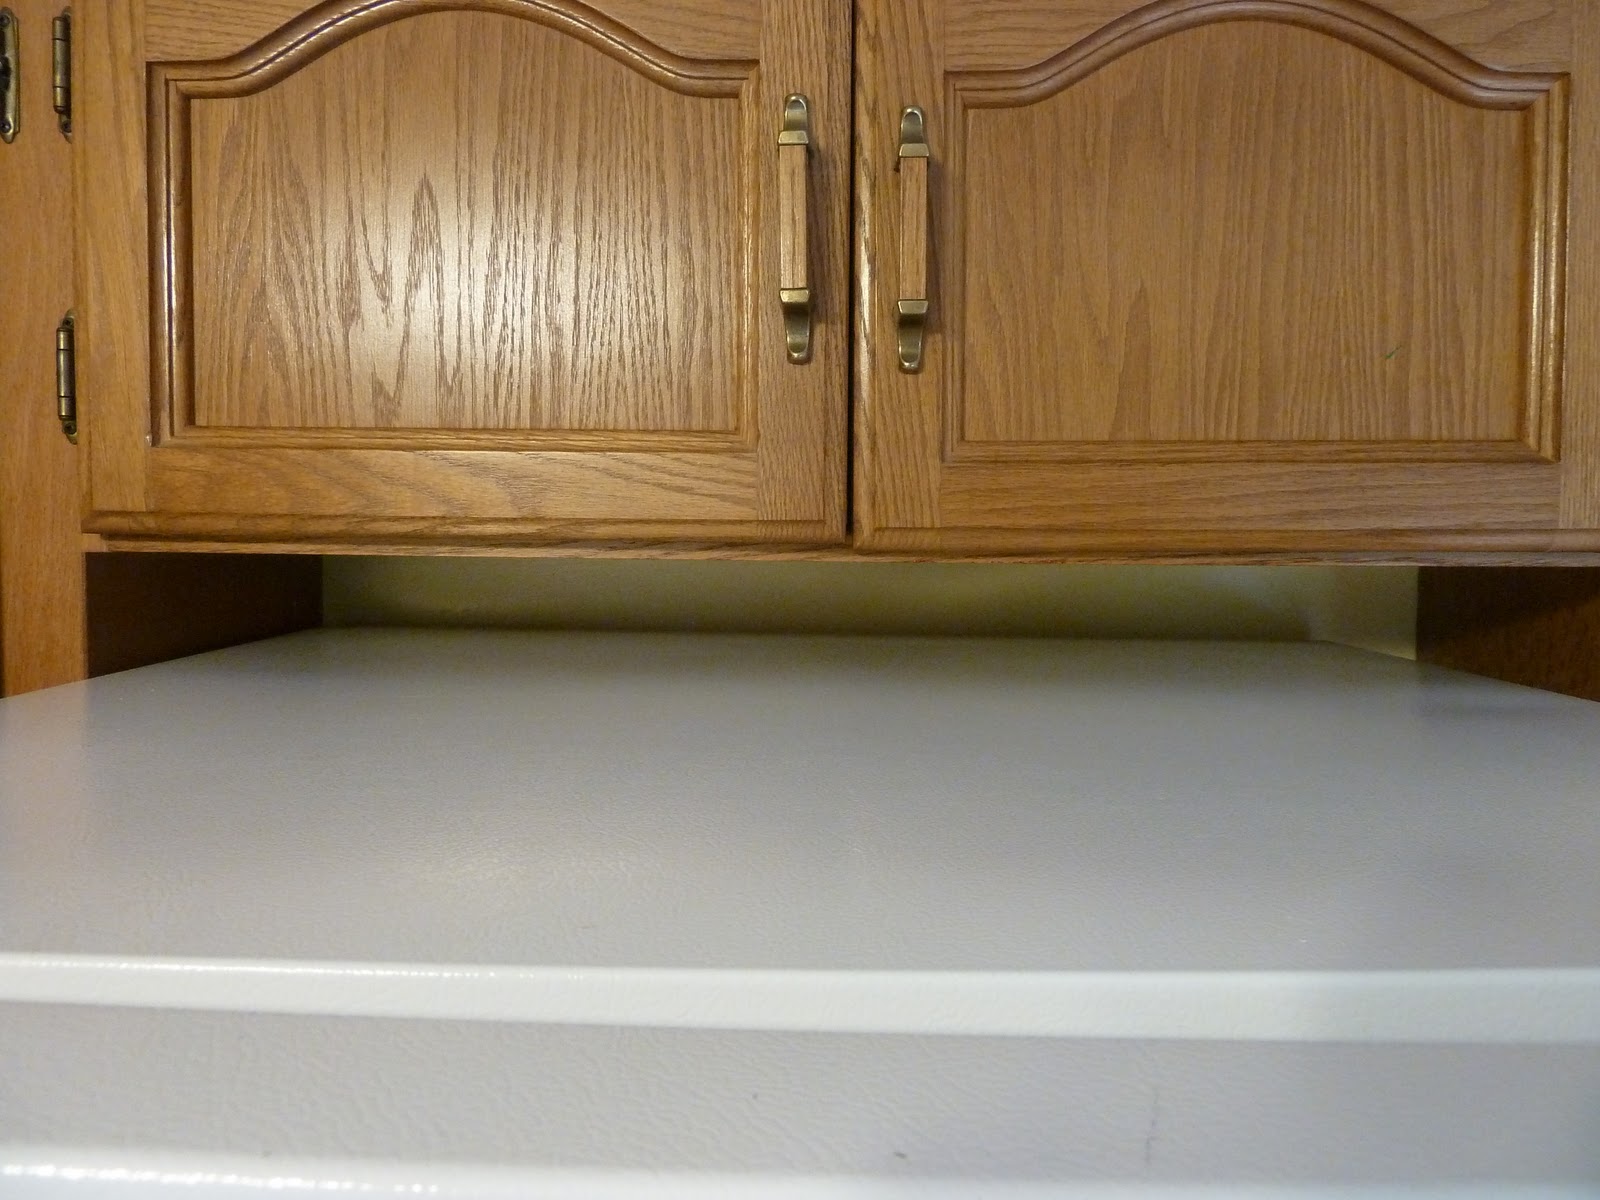
Daily Declutter Challenge #27- Top of the Fridge

At only 5 ft 2 & 3/4" I can't see the top of my fridge.  One time, one of our very tall friends was over for supper and I realized his head stood higher than my refrigerator.  I said to him, somewhat embarrassed, "You can probably tell it's been a long time since I've cleaned the top of my fridge." To which he answered, "It's been a long time since ANYBODY has cleaned the top of their fridge!"

Like this picture.

To be fair to myself, most of the stuff up here was crafty items that I didn't want my four year old getting into.  But since I have been reorganizing my cupboards I had some some space freed up, so it was all safely put away.  Also, do you notice another pen that escaped my Pen Gathering?

It was time for a clean sweep!  Everything got put away in proper spots, and the grime wiped away.  This was one of the quickest declutters yet!


 My goal now is never to put anything on top of my fridge.  It looks too cluttery, and also blocks the cabinet doors.  So, if you're ever over at my house, and see something on the top of of there....give me the shakey fist!

Friday, March 4, 2011

Daily Declutter Challenge #26 - Back Door Pile

We have a patio door in our kitchen that we use as a back door entry of sorts.  It mostly gets used in the summer when we eat on the patio, cook on the BBQ, or play in the backyard.  So, the area needs a little "mini mud room spot" to store shoes and also for the kids to hang up their backpacks.

But I don't think it needs to look like this!
 Ack!

The folding chairs were handy for company, but we didn't need them for daily use, so I managed to find some space in one of our few storage closets for them.  The large basket for shoes was the main problem.  It had become a huge clutter nest!  After I dumped out the pile of shoes, (most of which didn't fit my kids anymore) I found a bizarre assortment of items that had found a secret little home in the basket, never to be seen again.  Till now.

A bag of empty spray paint cans that needed to be taken to recycling, a lone ski glove, 2 work gloves, a pen that missed my pen roundup, strap from a booster seat, a beach shovel, and a plastic baby spoon.  It was time to get rid of stuff or actually put it away where it belonged!

I did need something to put shoes on for the back door, especially once warmer weather comes.  I went with a simple boot mat.  It's not quite big enough, but it's definitely better than the giant basket of debris.


Anyone else have back door solutions?  Do you have an exit from your kitchen that gets cluttered?  I'd love to hear your ideas!

Homemade Hot Chocolate Mix

During the long, grey, drizzly days of winter, one of the things my girls love is warming up with hot chocolate after school.  Some mothers make it from scratch with melted chocolate and milk mixed to sublime perfection over the stove.

I am not that mom.

I want to be able to put the kettle on, dump some powder into a cup, stir the boiling water in, and serve!

I've been buying this super sugary stuff for years.

Eek - do you see some of those ingredients?  All the things Dr. Oz would tsk. tsk.  (Side note, does anyone else find Dr. Oz as creepy as I do?  Or even worse, all the women that fawn all over him?)  Anyhoo, I don't need Dr. Oz to tell me that this is powdered stuff is the junk food of hot chocolate.  Sugar and Corn Syrup are 2 of the top 3 ingredients.  Cocoa doesn't even show up till fourth on the list.  It's even got hydrogenated soy bean oil.  (Hydrogenated oil = heart attack waiting to happen.)

Once this giant bin was empty, I decided to fill it with this homemade hot chocolate mix.  It is amazingly simple!

Mix:
2 Cups cocoa powder
3 Cups white sugar
12 cups powdered milk

This seemed pretty sweet to me, but I'm not gonna lie, my kids weren't too thrilled the first time they tried it, so I added  more sugar.  Over time I will gradually make it less sugary.

Soooo easy and much cheaper!  And no corn syrup or hydrogenated oil either.  Dr. Oz would be proud.   (He may even smile in his condescending, creepy manner.)

Thursday, March 3, 2011

Daily Declutter Challenge #25 - Tupperware Cupboard

I couldn't avoid this one forever.

Believe it or not, I actually thinned out this cupboard in a MAJOR way about a year ago.  I think I got rid of 50 yogurt containers.  But this corner cabinet is such a nemesis.  I don't have enough cupboard or drawer space to house my tupperware, so you know how it goes.  Things get tossed in, the door hurriedly shut, and then later you're on your hands and knees trying desperately to find a LID!!!!  Why does nothing ever match?

First things first, I pulled everything out, gave the cupboard a good wipe down, and then set about matching lids to their mates.  There's no way avoiding a huge mess on the kitchen floor, but the secret is that if you plan it right, you surround yourself with an inescapable sea of tupperware, from which you cannot be freed until the task is complete.  Thank goodness my 4 year old was in good spirits today and painted happily at the table while Mommy was occupied.

Then, I purged all the pieces that weren't matched (into the recycle bin) as well as any that were warped or broken.

Who needs to pay for organizers?  You know what I did!  Cut down some cereal boxes to house the lids!
You can see I have terrible printing....I wish I could make these look cutesy, but by this point into the process I just want to get it done!  I am no perfectionist....is there such a word as "good enough-ist?".


Then I nested the containers together according to shape and size.

I probably kept too many, so maybe I'll do another purge before our garage sale this spring.

Almost 15 years ago, I received at my bridal shower a giant cake tote.  I've never put a cake in it, but it has held baby rattles, books, and now large tupperware lids.  Since these are rarely used it got pushed to the back corner.


Large tupperware bowls (which usually end up as popcorn bowls) are on the bottom shelf, as well as items that aren't often used.


This little project took me two hours.  How quickly do you think it will become undone?

Keepin' it real....taking on a project like this means that the rest of my kitchen is a mess, my daughter's painting project has spread across the kitchen table, my big girls are now home from school and are scrounging for snacks and making their own hot chocolate, we leave for swimming lessons in half an hour and company is coming for supper tonight.  (Taco Soup is in the Crock Pot....easy, easy, easy)  But I must fly!

Organizing Junkie

Wednesday, March 2, 2011

Daily Declutter Challenge # 25 - Baggie Drawer

Does anyone else have one of these drawers? You store your saran wrap, aluminum foil, etc in there?

Well I do too, and one of my goals has been to actually cut down on our purchasing and usage of plastic bags. We made the switch to cloth grocery bags a while back, but I was still using little sandwich bags and produce/bulk food bags. I decided the least I could would be to reuse what I already have (from bread. produce, bulk items, cereal bags etc) and stop wasting money buying them.

But I forgot to mention this to my helpful husband and so a couple weeks ago he bought a hundred pack EACH of zip lock bags and snack bags. So we're stuck in plastic for a while yet.

Anyway, to the decluttering point. The drawer was getting crazy out of control with all my repurposing plans.

See?
That's a big mess o' plastic bags.

But as you may know....I've become a big fan of repurposing cardboard food boxes into custom sized organizers.  I took a peek into my recycling bin and found an empty Kleenex box that I thought would fit all the extra little plastic baggies that I was saving.  Plus, I cut down a couple other boxes for recycled freezer size zip-loc bags and wax paper cereal bags.

AFTER:


The Kleenex box fit PERFECTLY!  I was sure it would be too large, but the width was the exact size of the drawer, and the drawer shuts smooth like butter.  I can simply reach into the box & pull out a baggie just like a tissue.  I can't say enough how much this thrilled me.  I made my whole family come and check this organizational wonder out.  They humoured me.  And while my husband may not share my passion for repurposing, his spatial reasoning sure makes him appreciate a perfect fit.

Anyway, till I can get around to sewing my own reusable produce/bulk bags, then this will help me reduce my plastic bag consumption.

Before you toss your next Kleenex box, maybe you should take another look at it!  I think I'm going to save another one for my girls' headbands & hair elastics.  Drawer by drawer, bit by bit....I think I'm starting to get a hang of this organizing thang.

Tuesday, March 1, 2011

Crafting for the Clueless - Easy Upcycled Ruffled Velvet Flower Headband

My Mom had sent a pair of velvet leggings along to my four year old.  (My mom is an expert second hand shopper.)  And while the length was right, they were way too baggy and loose to work as leggings on my little, skinny minnie.  But the navy, velvet, stretchy fabric was so pretty I thought, "I'm sure I can upcycle this material!"

My other daughter wanted a little pouch to keep all her "silly bandz" in, so I quickly sewed up a drawstring tote with a piece of one of the legs.  (Just needed to sew up the bottom, fold over the top and sew it over top a piece of ribbon for the drawstring.

Not terribly even, but my girl was happy.

I stared at the remaining pieces on my table and noticed that the waistband looked about the size of a stretchy headband.  I trimmed some loose frays, and then made a ruffled flower embellishment.  I can't believe how easy these are to make.  It's basically circles of material, folded in half, then folded again.  Then sewed or hot glued onto a flat circle.  Here's a tutorial!  I didn't even follow all the steps.  I just did one layer of ruffle, and cut out all my circles the same size.  No biggie - it doesn't have to be perfect!

Then I sewed a little button on the middle & at the same time sewed it through to the headband.  I did this at the kitchen table in the amount of time it took for my girls to drink their hot chocolate & eat their after school snack.


Perfect for my girly-girl!

Linked to:  Today's Creative Blog

Tip Junkie handmade projects
Anything Related

http://www.thethriftyhome.com